Add and use shared inboxes
Overview
A shared inbox is an organizational space where you can categorize or sort conversations. A shared inbox can have channels such as email, Twitter, or SMS feeding into it, or can have no channels and be an empty inbox-- for more information on these options, see Explaining Front inboxes, empty inboxes, and channels.
Any admin can create a shared inbox, edit its settings, and change teammate access. This article will give a general overview of how to add and use shared inboxes. Looking for a specific setup guide for Gmail, Office 365, Twilio and more? Head here for platform-specific setup guides.
Take a Front Academy course here to learn more about leveraging Front inboxes to achieve your goals.
Instructions
Add a new shared inbox
Step 1
Click the gear icon on the top right of Front and into the Company settings tab.
Step 2
Click Inboxes in the left menu and Add a shared inbox.
Step 3
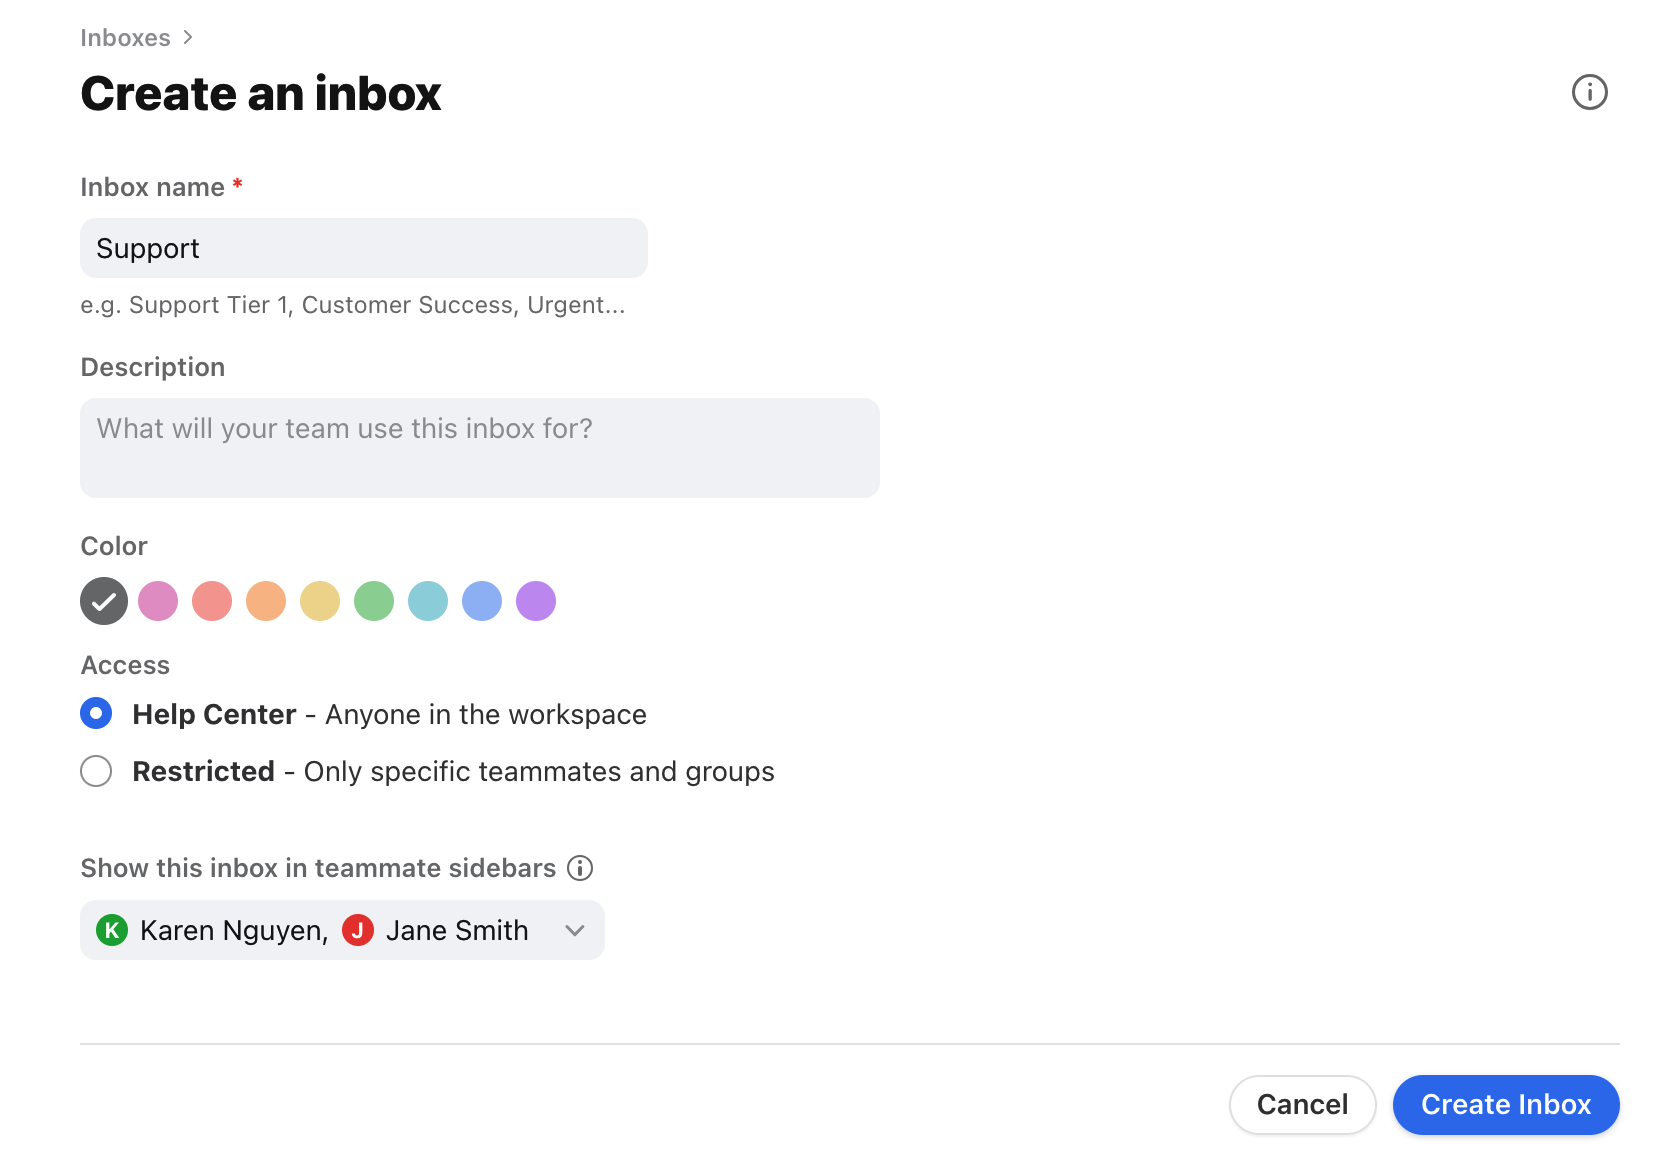
Fill in the following inbox fields:
Inbox name: Enter the name of the inbox, which displays in your sidebar and menus.
Description (optional): Enter a description for the inbox.
Color: Select a color for the inbox, which displays in your sidebar and menus.
Access: Select teammates who can access the inbox.
Workspace name: Grant access to all teammates in the Workspace, making it a public inbox
Restricted: Grant access to specific teammates or teammate groups
Show this inbox in teammate sidebars (optional): Select teammates to automatically add the inbox to their sidebars.
Step 4
Click Create inbox. You’ll automatically be taken to your inbox settings.
Step 5 (optional)
Use the top navigation tabs to configure additional inbox settings, custom fields, or business hours.
Step 6
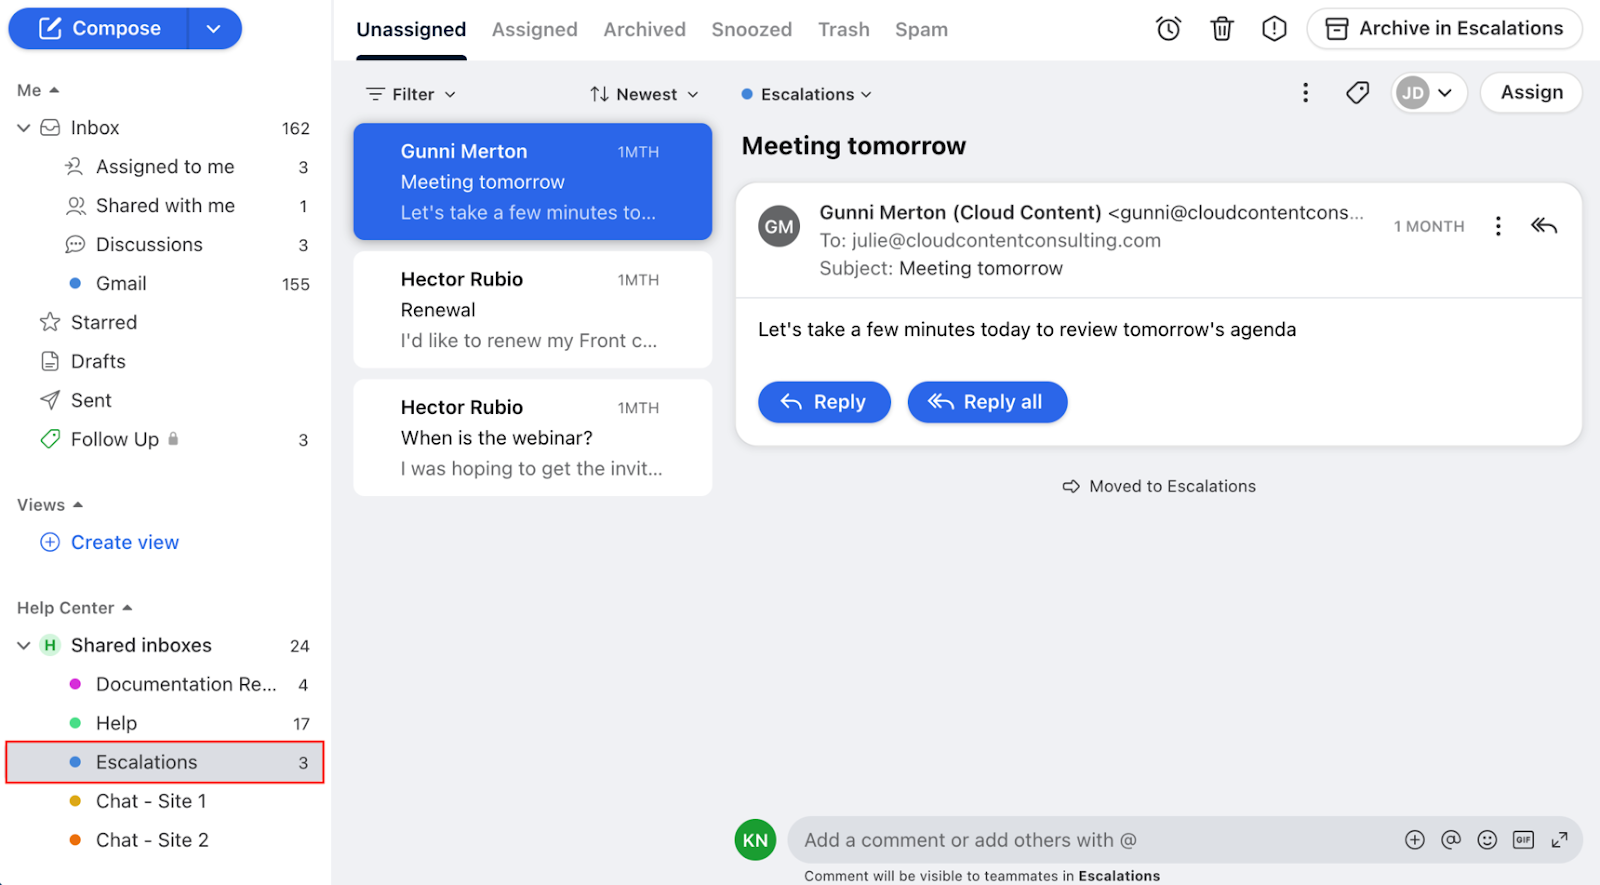
Navigate to your main inbox view to ensure it’s visible in your sidebar. If the inbox is not listed in your sidebar, follow the instructions here to add it.
Now you’re ready to connect a channel to route messages to this inbox! Otherwise, you can use your new inbox as an empty inbox.
Add a new channel
Step 1
Click Channels in the left menu and Connect a channel.
Step 2
Choose a channel type.
Step 3
Follow the steps on screen to configure the channel type you've chosen. See here for specific setup guides for all supported channel types.
Step 4
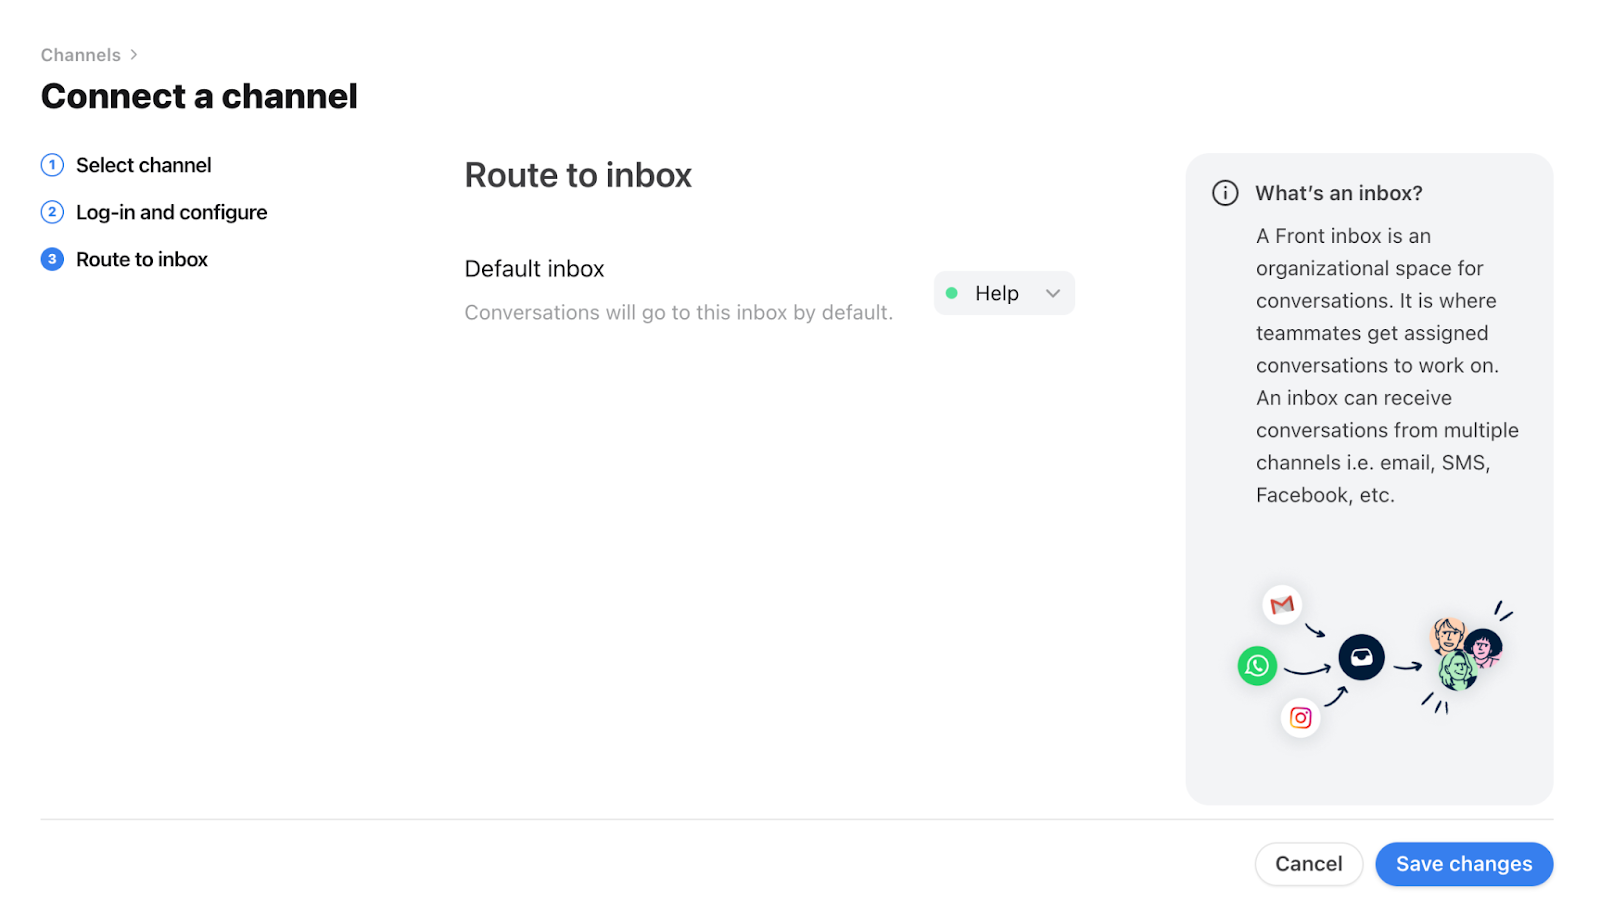
Select the inbox to connect to your channel. All messages from your channel will route to this inbox by default. If you need a new inbox, you can also create it directly from the dropdown menu here.
Step 5
Click Save changes.
Step 6 (Optional)
Configure any additional channel settings.
Move conversations to a shared inbox
Front allows you to move your shared inbox conversations to other shared inboxes, or move personal conversations into shared inboxes. More details can be found in this article.
FAQ
Can I add an existing inbox to my teammates' sidebars?
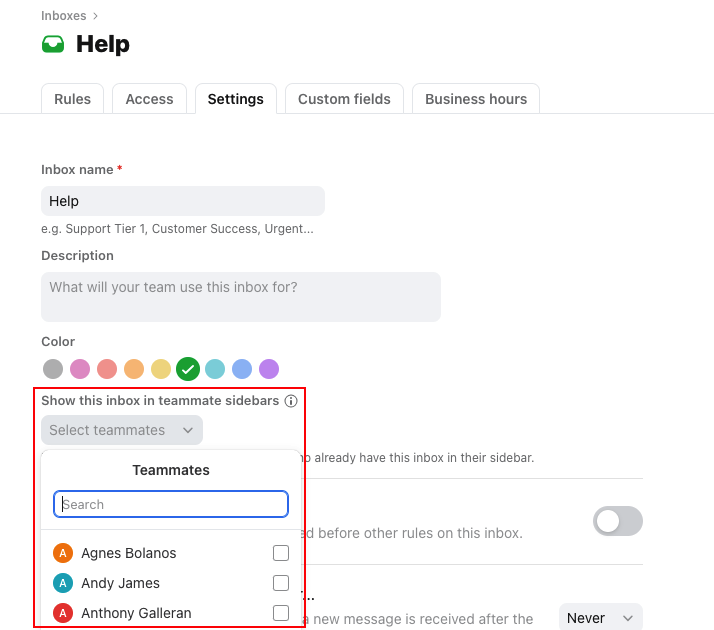
When you create any new shared inbox, including public inboxes, you will have the chance to automatically add the inbox to selected teammates' sidebars.
For existing inboxes, this setting is found in the inbox's Settings tab. You can select specific teammates to add the inbox to all teammates' sidebars.


